

Backstory: I've been wanting a new 'cosmetic bag' for a while. I've had my current one for probably 5 years and never did like it. While we were on vacation, I looked. Found some I liked, but weren't quite right. Looked once we got home. ...found cheap vinyl ugly ones. Not exactly what I had in mind. Even looked online. Found some REALLY cute ones on etsy. Almost bought. Still not quite right though. (what can I say, my mind's eye is 1. stubborn and 2. picky. Once its there, I can't change it)
I wanted BIG, and box shaped, and colorful and quirky without being obnoxious. So....out of half irritation I typed "cosmetic bag tutorial" into Google. (and this is why I love Google) I found these tutorials: crafster tutorial (this one also links to a more rounded shape bag if that's more to your liking) and three bears tutorial (which is the name of her blog, it is not - in fact - a tutorial for making three bears. fear not.)
I used the second one. The first is next on my list, but....ok the second one looked easier. =P
So now let's walk through the process together before you start your own! I won't get super technical here since you can just refer to the link. Plus....its not that tricky. :) I only made a few small mods - the size of my fabric, used a lining and interfacing, and made tabs on either side of the zipper.
And before we go on, I should point out that I'm a sloppy sewer and this was thrown together as a 'practice' bag. Sewing is not my strength, and I'm envious of those who have pristine corners and tidy edges and everything intersects just so. If you're accustomed to such results, you may want to take a few deep breaths before continuing on to the picture portion of our post. Thank you.
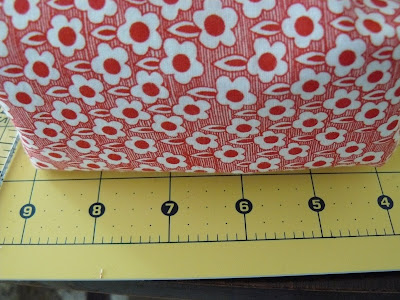
I cut my fabrics to 8"x7" (red outer fabric, medium weight interfacing, blue lining) I also took a scrap of the blue and cut it to 2" wide, fold it in half lengthwise - right sides together - sew a seam, turn it right side out, press it flat, cut in half, and then fold each piece in half to make a tab. I'll show you where that goes in later.

Now for you inexperienced sewers, this is your machine's zipper foot. Now, just to make you all feel better, let's just assume you've never sewed in a zipper before, and had read about said zipper foot...but had no earthly clue what one looked like. You find this crazy contraption in that little bag of odds and ends that came with your machine 5 years ago that you've never used. You could very well use Google to figure out that this is your zipper foot. ...If you needed to. I sure didn't! *hem*

So now you've found your zipper foot, and even got the dang thing on the machine (It kind of goes on off to the side....for you newbies who spent a good 2 minutes trying to figure out why the blasted thing wouldn't go on) Now time to sew the zipper to your fabric. Sandwich your fabrics, (all right sides facing out) and position your zipper and your outer fabric right sides to each other. Sew along the top edge, as close to the zipper as you can (this is easier to explain with the picture of this step that I didn't take...)
Open it up, press it flat and it should look like this... (red outer fabric, zipper, my pant leg)

Ok, now basically do the same again. Make your sandwich, right side of outer fabric facing your zipper. Kinda like...this:

That doesn't help? How bout this one:
 See how those top edges line up? Sew those suckers together.
 At this point you MAY have to stop to replace your needle. I won't...explain why. Just...if it looks like this...go ahead and change it. It will make the rest of the project much easier.
Ok, once that's done, sew that seam and open and press it flat. Now you have a zipper smack dab in the middle of your fabrics. Great, now what?

Glad you asked! Fold that sucker right sides together again, doing your best to make sure the bottom edges line up. I'm not saying they WILL...but...give it a shot. Now sew a seam there. And if you're like me, your fabrics don't totally measure up (because you didn't cut them 100% accurately in the first place, you lazy slob.) So...for good measure you MAY want to sew that second seam a bit higher up because you noticed not all the blue got caught in the first one.

Ok great! Now...take your bottom seam, and your top/zipper and line them up over each other. Smash it all down flat. ...You could use your iron if you so wish. This is where those tabs will come in. (this is where I had to stop for 5 minutes and figure out how they'd go in. I sometimes get tripped up by common sense...)
You'll want to put them in so the folded edge is inside and the raw edges are poking out. Make sure they're centered, and then sew that open edge shut. If you're paranoid (like me) go back and forth over the zipper and extra time or two. Repeat for the other side.

If you were to turn it right side out, this is what it would look like. You don't need to...unless you want to check your outer seams again to make sure all layers got caught. I did, mine were fine. *phew*

Inside out again....Pinch your corners, pin them, draw a line, and sew. (the more you cut off, the taller your bag will be, the less you cut off, the more 'boxy' it will be. I cut off about an inch and a half.)

All stitched up...

Now cut 'em off! ...Just pretend that raw edge is the telltale 'V' pattern left from pinking shears. I know I should have them, but I don't. I always think "I should pick up a pair" then I stand in front of them at the store, staring at the price and thinking "I should go into the pinking shear business" Its not that they're OUTRAGEOUS. But I have a limited craft budget. (because of stupid things like groceries, and car insurance...pfft.) So when it comes to pinking shears, or more fabric...well, you can guess where my loyalty lies.
So anyway, corners be gone!

Then just trim any extra zipper ends, loose threads, and the like. Now turn that puppy right side out and admire your handiwork!
About this time you'll realize that you forgot to go back and topstitch along the zipper edges. You should technically do that after attaching both sides, and before sewing the bottom seam shut. ...for the record. But you're lazy and don't care that much. You'll keep a mental note for next time though.

You just made your new cosmetic bag, neato huh?

For the record, the measurements above give you a bag that's about 4"wide, 5" long and 2 1/2" tall.
Now, you may be slightly disappointed as you want a bag about twice that size. But you're so smitten with your new creation that you don't much CARE. (I knew rough dimensions going into it, I'll have to tinker with making the larger one)

Because even for its lack of girth, you can fit all of this into it:
 And that suits you just fine. (and now you all know my dirty secret. I buy generic makeup from Walgreens....ok its not much of a dirty secret, but its all I've got.)
And there ya go! Pack it full and enjoy it each morning! And if you really do want to make one, ignore my insane directions and go for the clear instructions in that link ;)
There is a way to do this where the lining is sewn separately, then turned in, hiding all the raw seams. But this was practice, and I just wanted to get it done and get an idea of the results, so I didn't worry about it. I would like to make one larger, and I may use that technique.
This was really easy, I bet it took me...an hour? If that, and that included walking back to double check the steps, and tinkering with tabs...and bent needles. You could easily whip up a few in an afternoon out of leftover scraps or a few fat quarters. I think they'd make great gifts - filled with bath goodies, candies, or lotions. For toting matchbox cars or polly pocket/barbie odds and ends. So go ahead and make 10 of them. And then send me a link when you do!


29 comments:
Cute! Cute! Cute! And you did great with the zipper.
Obviously, you and I went to the same sewing school cuz I have needles that look just like yours!!!!
Something about taking out pins??? Who knows? I was talking in class!
Man, you do way better with zippers than I do.
Love this. Such a cute bag. I especially enjoyed the picture of the bent needle. Sometimes I think I should wear safety glasses for those moments when the needle does break and you're not quite sure just where the pointy end of the needle went.
I love your tutorial - it's so funny. Much more entertaining when people admit to their mistakes! Did you ever figure out how to do the lining the other way?
Thank you for such a clear and entertaining tutorial!! I'll be adding this to my list of great tutorials to try when I stop being a lazy bum. Hehe!
I agree with the other comments. It is fun to read a "real" tutorial and see the mistakes -ahem- design decisions people make. In fast I don't think those were mistakes, just things you did on purpose to make the tute more entertaining! So cute too! Thanks for sharing. That looks easy and fun and I might just make one, even though I try to avoid make up if possible.
Anna
This was so funny, it really brightened my afternoon, I have those scissor moments often. I'm using my kitchen shears to cut my material, first have to wipe the food off!
I don't think those were mistakes, just things you did on purpose to make the tute more entertaining! So cute too! Thanks for sharing.
Loved your tutorial - it was like you were talking directly to me! Can sew a little, but not as good as others. Will definitely try this one. PS: You are very funny, too!
Thanks for showing a picture of the zipper foot. I did do a google image search for it and it brought me to your picture! Yay! I found out what mine (that I actually did get about 5 yrs ago) looks like!!!
I'm trying this this afternoon. I wonder if binding over the unfinished seems would be an easy fix....
Oh this is the best tutorial I've read for a while. You're just like me! It's all "before this step you probably should have..." and "I did it this way, but do what I say, don't do what I do." It's much the best way to teach!
And that needle - that's a real achievement. Damn metal zipper heads hide under folds of fabric just waiting to banjax your needle, I've so been there.
Great tutorial. Your candidness made me laugh out loud a couple times. Sounds like stuff i would say a lot!! Hahaha. Great job! Gonna try it.
I have made 3 so far and am having so much fun! Everyone keeps asking me where I bought my little bags and I love getting to say "oh, i made it!" I love love love this tutorial... thank you!
Wow! Thank you SO much for this excellent tutorial :D I surely do wish all tutes were so clearly written and contained pictures relevant to the instructions. You are AWESOME! Looking at the finished bag, I was thinking there was no way I could sew that, but your explanation is clean, clear and fabulous! I can't wait to get sewing...
This would be a great giveaway! I can't sew at all, but this bag is adorable. I love that you can use any colors and fabrics! sooooo creative! Love it!
Hi,
I linked to this project on AllFreeSewing.com. I think it's a great project that our readers will love to make. Here's the link:
http://www.allfreesewing.com/Miscellaneous-Projects/Cosmetic-Bag
If you have any questions or you would like to see more of your projects on the site, please feel free to contact me.
Thanks!
Kirsten
Editor
AllFreeSewing.com
Okay, Okay...I didn't make mine just like yours, but I am teaching myself to sew. Thank you so much for the explination on the zipper..I have made a bunch of these...now to figure out how to get you a pic. to see...lol
Thanks for the tutorial. I just made one up to hold a bean bag heating pad. Loved it and your humor.
I know this post is a few years old, but I just wanted to say thank you thank you thank you for posting it!
I just made myself a little makeup bag (minus the tabs on the side- I'm not that fancy yet!) and I love it. :)
Thank you for the clear pictures and explanations- I especially got a kick out of the bent needle. And I had to run back to your post to compare zipper feet, as I had no idea what I was looking for.
Thanks again!
Just want to say I think people who demean others, even in jest, suck.
While you have a nice project, it really is in poor taste to call your audience "lazy slob". Particularly when people who sew aren't "lazy", and it's pretty presumptuous to assume others are "slobs" just because you are.
I'm equally surprised at how many people will eat up the arrogant insulting attitude and even thank you for it!
I guess that's why this country is failing - 'cause The People don't even know when they're being abused.
How many pieces of each fabric?
What size zipper?
Very cute bag, my process for locating my zipper foot is IDENTICAL to the one you mention in your post :)
Love this! I just made a similar one for the first time last night in my beginner's sewing class and I'm pretty sure I'll be practising them all week!
Great tutorial! I loved it, and so funny. Here's a link to mine...http://brassbirddesigns.blogspot.com/2012/07/they-look-pretty-good-right-also.html
And you were right, I totally wanted one twice the size and I don't know how I read your whole tutorial and didn't realize the end size. I have a bunch now though, they are great for assembly line sewing!
THANK YOU all for the awesome comments! I'm so glad you all could make sense of my rambling ;)
I can't reply to individual comments (that I know of) but to answer a few questions:
zipper size: I usually use a zipper 2" longer than my cut fabric. So 7" fabric length = 9" zipper. 10" fabric length = 12" zipper. I've also used a longer zipper if I come across them on the cheap, you can just cut them down, just be sure to slide the zipper to the middle first. ;)
Fabric - two pieces of your outer fabric and lining (so you're working with 4 pieces of fabric, plus 2 pieces of interfacing if you use it) I've found for most sizes I make, you can just get two fat quarters (an outer pattern, and liner pattern)
If you have a finished bag, email me a photo cuppscraps @ gmail.com and I'll post it :)
hello!
I really loved this tutorial and I mention it to my blog...
http://treliz.net/2012/10/24/boxed-bags/
If you'd like to see it :)
OBVIOUSLY MADE WITH LOVE AND A WONDERFUL SENSE OF HUMOR, AS IMPORTANT AS NEEDLE AND THREAD...AWESOME TUTORIAL
I just found this on Pinterest, I'm a newbie sewer and have been making tote bags out the wazoo and you totally just blew my mind informing me that those little triangular corner things can actually be cut off! I've never known quite what to do with them it never clicked to just remove the stupid things! So obvious now! Thanks for the tutorial, and the suggestions at the end too... I love containers. And bags. And anything you can put something in.
Post a Comment